Basic gold panning techniques come down to five essential moves that every beginner learns first: filling and submerging the pan, breaking up the material, stratifying the gold to the bottom, washing off the lighter material, and finishing to reveal your gold.
Panning looks simple, and the fundamentals are, but there is real skill in the details. Master these five core moves and you will recover far more gold than someone who never learned to do them properly.
The beauty of these techniques is that they rely on a single principle, gold’s weight, and once you understand it, the whole process makes intuitive sense. Each move serves the goal of separating heavy gold from everything else.
This guide breaks down the five essential panning moves beginners learn first, explaining how and why each works, so you can build a solid foundation of technique from your very first pan.
TL;DR
- Move 1 – Fill and submerge: Load the pan with material and get it underwater.
- Move 2 – Break it up: Work the material to break apart clay and clumps.
- Move 3 – Stratify: Shake the pan level to settle heavy gold to the bottom.
- Move 4 – Wash off: Tilt and swirl to remove lighter material gradually.
- Move 5 – Finish: Carefully reveal and collect the gold in your concentrate.
- One principle: Every move uses gold’s weight to separate it from lighter material.
Learning the basic gold panning techniques means mastering five essential moves, and it all starts with the first and most fundamental: getting material into your pan and under the water.
Featured
Move 1: Fill and Submerge the Pan
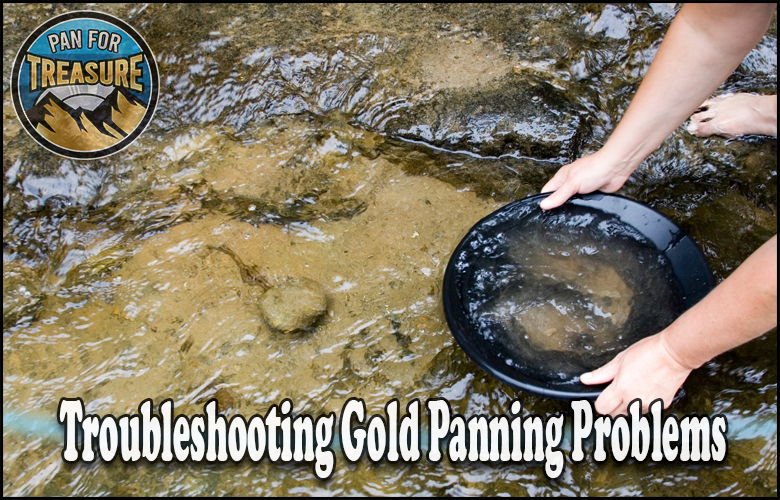
The first essential move is loading your pan and getting it underwater. This sets up everything that follows, so doing it right matters.
Fill your pan roughly one-half to two-thirds full with gravel and material from a promising spot. Overfilling makes the pan hard to work and risks losing gold, so avoid packing it to the brim.
Then submerge the pan fully in the water. Working underwater is essential, since water is what allows the heavy gold to separate from the lighter material through the moves that follow.
With the pan filled to a manageable level and fully submerged, you are ready to begin processing. This simple starting point sets you up for effective separation. Our guide on gold panning techniques for beginners reinforces these basics.
Our Favorite Posts
Move 2: Break Up the Material
The second move is breaking up the material in your pan. Gold can be trapped in clay and clumps, so freeing it is essential before you can separate it.
Underwater, use your hands to work the material, breaking apart any clay, mud, or clumped gravel. Clay in particular can trap fine gold, so dissolving it releases gold that would otherwise be lost.
As you break up the material, remove the largest rocks. Check them for any attached gold first, then discard them, since they only get in the way of the finer processing to come.
- Break up clay: Dissolve clumps that can trap gold.
- Work by hand: Use your fingers to free trapped material underwater.
- Remove big rocks: Check and discard oversized material.
- Free the gold: Ensure gold is loose and able to settle.
This step ensures all the gold is freed from clumps and ready to sink. Skipping it leaves gold trapped in clay, so it is well worth the effort. Classifying material beforehand, as our tips and tricks guide covers, makes this easier.
Move 3: Stratify the Gold
The third move is the heart of panning: stratifying the material so the heavy gold settles to the bottom. This is where gold’s weight does the work.
Hold the pan level and submerged, and shake it firmly side to side (and sometimes in a circular motion). This agitation causes the material to sort by weight, with the heaviest, gold, sinking to the bottom.
This stratification is the crucial step. By getting the gold to the bottom of the pan, you protect it during the washing that follows, since the light material on top is what gets removed first.
| During Stratification | What Happens |
|---|---|
| Heavy material (gold) | Sinks to the bottom of the pan |
| Light material | Rises toward the top |
| Result | Gold protected at the bottom for washing |
Getting comfortable with the shaking motion is key to good panning. Repeating it periodically throughout the process keeps the gold safely at the bottom as you wash. This is the move that most rewards practice.
Recommended Reading
Move 4: Wash Off the Lighter Material
The fourth move is washing away the lighter material now sitting on top. Done carefully, this removes everything but the heaviest concentrate and gold.
After stratifying, tilt the pan slightly away from you and use a gentle swirling or dipping motion to let water carry the top layer of light material over the forward edge. Remove only a little at a time.
Crucially, pause and re-stratify periodically. Shaking the gold back down to the bottom between washing motions ensures you never wash away gold along with the light material.
- Tilt gently: Angle the pan slightly forward.
- Swirl and dip: Let water carry off the top light material.
- Go slowly: Remove only a little material at a time.
- Re-stratify often: Shake the gold back down between washes.
This patient alternation of washing and re-stratifying is what protects your gold while removing everything else. Rushing it is the top cause of lost gold, so take your time. Our techniques and methods guide details this rhythm.
Beginners' Tips
Move 5: Finish and Reveal the Gold
The fifth and final move is the finishing stage, where you carefully work down to reveal your gold. This is the rewarding payoff of the process.
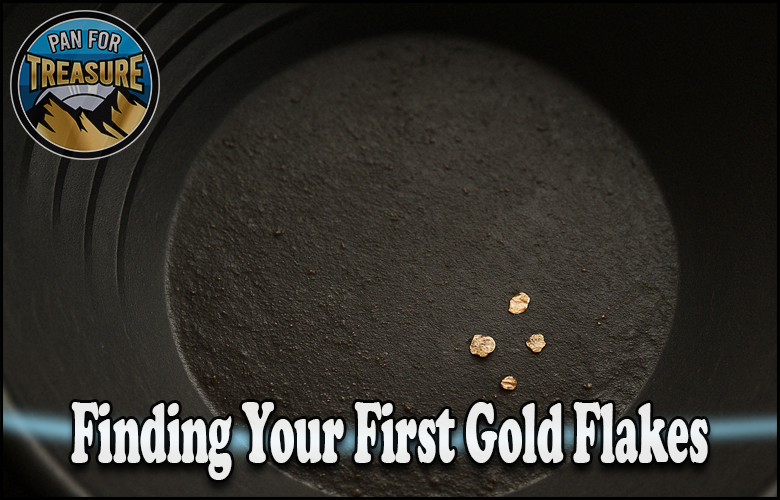
As you wash away the lighter material, you will be left with a small amount of heavy concentrate, often including black sand, and, if you have chosen well and worked carefully, gold.
Finish by gently swirling a little water across the concentrate to spread it out and reveal the gold. The gold, being heaviest and often bright, will show itself among the darker heavy sand.
Collect any gold with a snuffer bottle and store it in a vial. This careful finish reveals the reward of your work and secures the gold you have recovered. Recognizing gold among the concentrate is covered in our guide on getting started with gold panning.
Resources for Learning Technique
These authoritative sources support your panning technique and knowledge:
- U.S. Geological Survey (USGS) — Data on gold and where it concentrates.
- Bureau of Land Management: Mining and Minerals — Rules for panning on public land.
- Gold Prospectors Association of America (GPAA) — Community and instruction on panning technique.
- USDA Forest Service: Minerals and Geology — Regulations for panning on National Forest lands.
Conclusion
The five essential panning moves, filling and submerging, breaking up material, stratifying, washing off, and finishing, form the complete foundation of gold panning technique. Master them and you have everything you need to recover gold.
Every one of these moves serves a single principle: using gold’s weight to separate it from lighter material. Understanding that makes the whole process intuitive and easy to remember.
The move that most rewards practice is the alternation of stratifying and washing, since patient, careful separation is what protects your gold. Rushing it is the main cause of lost gold, so take your time.
With these basic gold panning techniques mastered, you have the skills to find gold consistently. Practice the five moves, and each pan will bring you closer to the smooth, effective technique that defines a skilled panner.
Frequently Asked Questions – Basic Gold Panning Techniques
What are the basic steps of gold panning?
There are five essential moves: fill and submerge the pan, break up the material to free trapped gold, stratify by shaking so heavy gold settles to the bottom, wash off the lighter material by tilting and swirling, and finish by revealing and collecting the gold in your concentrate.
Why do I shake the pan?
Shaking the pan level and submerged stratifies the material by weight, causing the heavy gold to sink to the bottom while lighter material rises to the top. This protects the gold during washing, since the light material on top is what gets removed first. It is the crucial move.
How do I avoid washing away my gold?
Wash slowly, removing only a little light material at a time, and re-stratify frequently by shaking the gold back down to the bottom between washing motions. This patient alternation ensures the gold stays protected at the bottom while everything lighter is removed.
Why break up the material first?
Gold can be trapped in clay and clumped gravel, so breaking up the material underwater frees it to settle. Clay in particular traps fine gold, so dissolving clumps releases gold that would otherwise be lost. Skipping this step leaves gold stuck and unrecoverable.
What is left at the end of panning?
After washing away the lighter material, you are left with a small amount of heavy concentrate, often including black sand, and, if you chose good ground and worked carefully, gold. A gentle final swirl spreads the concentrate to reveal the gold, which you collect with a snuffer bottle.
How long does it take to learn to pan?
The basic moves are simple to learn, and you can start finding gold on your first day. Mastery, especially the smooth alternation of stratifying and washing, comes with practice. Each pan builds skill, and consistent practice quickly turns the fundamentals into effective, reliable technique.
⛏ Recommended Gear ⛏


* As an Amazon Associate I earn from qualifying purchases at no extra cost to you.
Subscribe to Our Newsletter

Ryan Conlon is the founder of Pan for Treasure.
A lifelong gold panning enthusiast, he created this site to help beginners learn the ropes and share practical tips from his own time on the creek. [email protected]