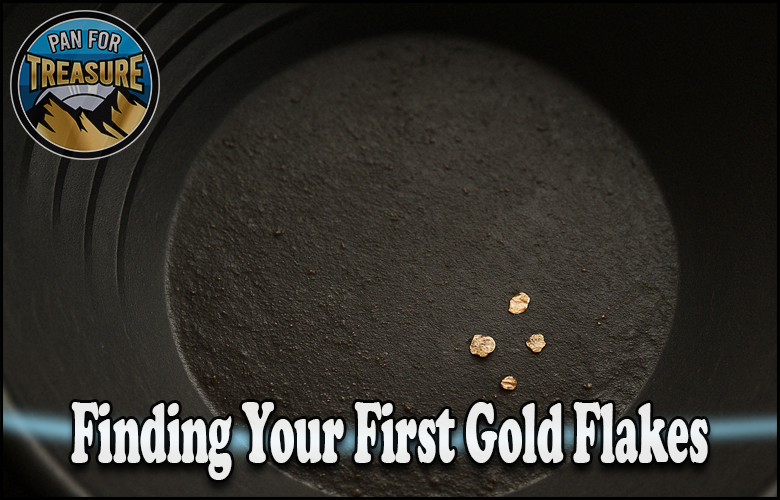
Finding your first gold flakes is easier than most beginners think, and it comes down to a simple, repeatable system: choose gold-bearing ground, dig the right material, pan it carefully, and read your concentrate, an approach that works in virtually any creek that holds gold.
The dream of every new prospector is seeing that first gleam of gold settle in the pan. It feels like it should be difficult, but with the right system, it is a very achievable goal, often on your first or second outing.
The secret is not luck but method. A reliable, repeatable approach removes the guesswork, putting you in the right place, working the right material, with the right technique. Follow the system, and the flakes will come.
This guide lays out a straightforward system for finding your first gold flakes: how to choose a spot, what material to dig, how to pan it properly, how to read your concentrate, and how to build on your first success.
TL;DR
- Choose gold-bearing ground: Start in a region and spot where gold actually occurs.
- Dig the right material: Target where gold concentrates, like bedrock and inside bends.
- Pan carefully: Use slow, patient technique to keep the fine gold.
- Read your concentrate: Learn to spot gold among the black sand.
- Repeat the system: A consistent method works in any gold-bearing creek.
- Build on success: Your first flakes confirm your spot and technique both work.
The system for finding your first gold flakes is simple and repeatable, and it begins with the most important decision of all: choosing ground that actually holds gold.
Featured
Step 1: Choose Gold-Bearing Ground
The foundation of finding gold is being where gold is. No system works in barren ground, so choosing a gold-bearing location is the essential first step.
Start with the region. Focus on areas with a documented history of gold, whether famous gold-rush regions or areas with known local occurrences. Research reveals where gold has been found before.
Within a gold-bearing area, choose a specific creek or stream known or likely to hold gold. Local knowledge, prospecting communities, and research all help you identify promising water.
- Pick a gold region: An area with a history of gold.
- Find a likely creek: Water known or likely to hold gold.
- Use research: Tap records, communities, and local knowledge.
- Confirm access: Make sure you can legally prospect there.
Getting this first step right sets up everything else. In gold-bearing ground, the system reliably produces flakes; in barren ground, nothing will. Our guide on getting started with gold panning helps you choose good ground.
Our Favorite Posts
Step 2: Dig the Right Material
Once you are in a good creek, the next step is digging material from the spots where gold concentrates. Not all material in a creek is equal, so target the productive zones.
Because gold is heavy, it collects in predictable places: on the inside of bends, behind boulders, in cracks in bedrock, and wherever the current slows and drops heavy material. Dig from these spots.
Aim to work down toward bedrock where possible, since gold settles deep. Material from near bedrock, and especially from bedrock cracks, tends to be far richer than loose surface gravel.
| Where to Dig | Why It’s Productive |
|---|---|
| Inside of bends | Slowed current drops heavy gold |
| Behind boulders | Sheltered slow water traps gold |
| Bedrock cracks | Crevices catch concentrated gold |
| Near bedrock | Gold settles deep against solid rock |
Digging from these concentration spots, rather than at random, dramatically improves your odds of finding gold. This targeting is a big part of the system’s reliability. Our guide on gold panning tips and tricks covers reading where to dig.
Step 3: Pan Carefully
With good material in your pan, careful technique is what turns it into visible gold. Patient panning is the difference between finding flakes and washing them away.
Classify the material first if you can, removing large rocks, then pan slowly and gently. Fill the pan no more than two-thirds full, submerge it, and break up any clay to free trapped gold.
Then use the core technique: shake the pan level to settle gold to the bottom, then tilt and swirl gently to wash off the lighter material a little at a time, re-stratifying frequently so gold stays down.
- Classify first: Screen out large rocks for easier panning.
- Fill moderately: No more than two-thirds full.
- Settle the gold: Shake level so gold sinks.
- Wash gently: Remove light material gradually, re-stratifying often.
The key throughout is patience. Slow, gentle panning keeps the fine gold that hasty washing loses. This careful technique is essential to the system’s success. Our guide on gold panning techniques for beginners details the method.
Recommended Reading
Step 4: Read Your Concentrate
As you finish panning, you are left with a small amount of heavy concentrate, and learning to read it is how you spot your gold. This final step reveals your reward.
The concentrate typically includes black sand, dense dark minerals that collect with gold. Your gold will be among this heavy material, so knowing how to look is important.
Gently swirl a little water across the concentrate to spread it out. Gold, being heavy and often bright, shows itself as it lags behind the lighter black sand, appearing as gleaming flakes or specks.
- Expect black sand: Heavy dark minerals collect with gold.
- Spread the concentrate: Swirl water gently to reveal it.
- Spot the gold: Look for bright, heavy flakes among the sand.
- Collect carefully: Use a snuffer bottle to capture the gold.
Learning to recognize gold in your concentrate is a satisfying skill that comes quickly. Once you can read your pan, finding your flakes becomes reliable. Our guide on getting started covers identifying gold and its look-alikes.
Step 5: Repeat and Build on Success
The beauty of this system is that it is repeatable. Once it produces your first flakes, you can apply it again and again to keep finding gold.
Your first flakes confirm two things: your location holds gold, and your technique works. That is valuable knowledge, so work the productive area thoroughly and repeat the system nearby.
As you repeat the process, refine each step. Better location choice, smarter digging, and more polished technique all compound, steadily increasing your finds over time.
The system works in any gold-bearing creek because it is built on the universal principles of how gold concentrates and how panning separates it. Master it once, and you can find gold wherever it occurs. Our guide on tips and tricks helps you keep improving.
Resources for Finding Your First Gold
These authoritative sources help you find gold successfully and legally:
- U.S. Geological Survey (USGS) — Maps and data for finding gold-bearing creeks.
- Bureau of Land Management: Mining and Minerals — Rules for prospecting on public land.
- Gold Prospectors Association of America (GPAA) — Community and guidance for finding gold.
- USDA Forest Service: Minerals and Geology — Regulations for prospecting on National Forest lands.
Conclusion
Finding your first gold flakes is far more about method than luck. A simple, repeatable system, choose gold-bearing ground, dig the right material, pan carefully, and read your concentrate, reliably produces results.
Each step builds on the last. Being where gold is, targeting the spots where it concentrates, using patient technique, and learning to spot gold in your pan together remove the guesswork from finding gold.
Your first flakes are both a thrill and a confirmation: they prove your location and technique work. From there, repeating and refining the system keeps you finding gold and steadily improving.
Because it rests on the universal principles of how gold concentrates and how panning works, this system for finding your first gold flakes works in virtually any creek that holds gold. Follow it, be patient, and enjoy the timeless reward of finding your own gold.
Frequently Asked Questions – Finding Your First Gold Flakes
How do beginners find their first gold?
By following a simple, repeatable system: choose gold-bearing ground, dig material from the spots where gold concentrates, pan it carefully with patient technique, and learn to read your concentrate to spot the gold. This method removes the guesswork and reliably produces flakes.
Where should I dig to find gold?
Target the spots where gold concentrates: the inside of stream bends, behind boulders, in bedrock cracks, and near bedrock where gold settles deep. Material from these productive zones, especially from bedrock crevices, is far richer than loose surface gravel dug at random.
Why do I keep losing gold while panning?
Usually because of rushing. Fine gold is easily washed over the edge if you tilt and swirl too fast. Pan slowly and gently, remove only a little light material at a time, and re-stratify frequently by shaking the gold back down to the bottom between washing motions.
What does gold look like in my pan?
After washing away the lighter material, you are left with heavy concentrate that often includes black sand. Your gold appears among it as bright, heavy flakes or specks that lag behind the lighter sand when you swirl water gently across the concentrate. It usually gleams distinctly.
Does this system work in any creek?
It works in any gold-bearing creek, because it is built on the universal principles of how gold concentrates and how panning separates it. It will not produce gold in barren ground, so the key is starting in a region and creek that actually holds gold.
What should I do after finding my first flakes?
Your first flakes confirm your location holds gold and your technique works, so work the productive area thoroughly and repeat the system nearby. As you repeat it, refine each step, since better location choice, smarter digging, and polished technique compound to increase your finds over time.

⛏ Recommended Gear ⛏


* As an Amazon Associate I earn from qualifying purchases at no extra cost to you.
Subscribe to Our Newsletter

Ryan Conlon is the founder of Pan for Treasure.
A lifelong gold panning enthusiast, he created this site to help beginners learn the ropes and share practical tips from his own time on the creek. [email protected]