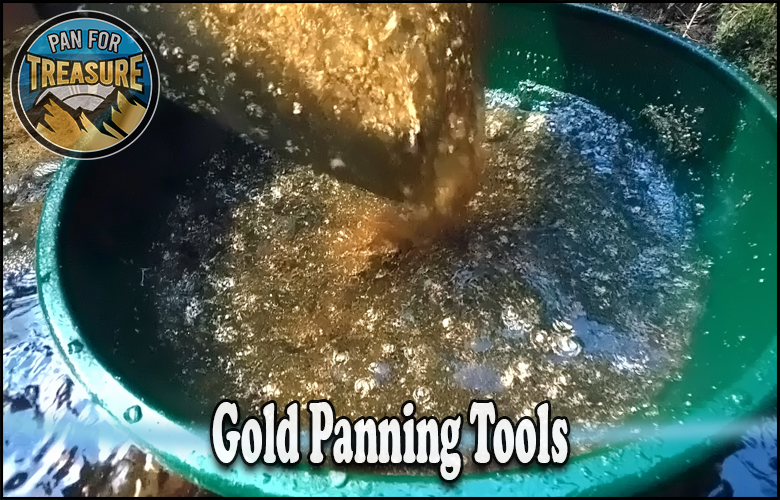

Setting up gold panning kits is the difference between splashing water around and actually walking away with color in your vial.
Get your gear laid out, fill the pan the right way, and work through the motions in order, and gold will settle to the bottom where you can catch it every time.
The good news is that panning is a skill anyone can learn in an afternoon. The physics does most of the work, since gold is far heavier than the sand and gravel around it, and your job is just to give that weight difference a chance to act.
This is the step-by-step field process, from the first scoop of dirt to the last flake in the bottle. Follow it in order and each pass gets cleaner.
TL;DR
- Lay out your kit first. Pan, classifier, snuffer bottle, magnet, and vials within reach before you start.
- Fill to two-thirds. Overfilling a pan makes it heavy and spills gold, so leave room to work.
- Submerge and settle. Sink the pan and let gold start dropping before you agitate.
- Shake, then wash. Side-to-side shaking drives gold down, then tilt and wash the light material off the top.
- Pull the big rocks. Remove washed gravel by hand and settle the pan again between passes.
- Finish with a magnet. Clear the magnetite, then snuffer up the gold into a bottle.
Featured
Setting Up Your Kit Before You Start
Before the first scoop of dirt, get your gear organized so you’re not fumbling with wet hands halfway through a pan.
A basic setup needs the pan, a classifier, and a place to work in shallow moving water. Add a snuffer bottle, tweezers, a magnet, and a vial or two, and you have everything to take material from raw dirt to clean gold.
Find water that’s shin-deep and moving gently. Fast water washes gold out of your pan, still water lets silt cloud everything, so a calm spot just off the main current is what you want.
Set your vials and snuffer bottle somewhere they won’t float away, on a flat rock or clipped to a bag. Losing your gold container downstream is a rookie mistake worth avoiding.
If you’re still gathering the pieces, best tools for gold panning covers what belongs in a working kit before you head out.
Our Favorite Posts
Filling the Pan and Submerging It in Water
Start by classifying your material into the pan, or scoop dirt directly if you’re skipping the screen, but don’t overfill.
Fill the pan about two-thirds full. A pan crammed to the rim is heavy, hard to control, and far more likely to spill gold over the edge when you shake it.
Now sink the whole pan under the water and let it sit for a few seconds. This soaks the material, starts breaking up clay, and lets the heaviest particles begin their trip to the bottom before you do anything else.
While it’s submerged, break up any clay lumps with your fingers. Clay traps gold, and a stubborn clod can carry flakes right out of your pan if you don’t crumble it underwater first.
Cold water makes clay worse. In early spring at around 40 degrees, the same clay that falls apart easily in a warm summer creek turns to paste, so give it extra time to soak.
Shaking and Using Circular Motions to Separate Materials
With the pan submerged, shake it firmly side to side to stratify the load. This is the single most important motion in panning.
The shaking drives the heavy gold down through the lighter material toward the bottom of the pan. Keep the pan level and underwater, and use a firm, even back-and-forth motion for several seconds.
Then switch to a gentle circular swirl. The circular motion moves the lighter material toward the surface and the edges while the gold stays pinned at the bottom against the riffles.
Alternate between the two. A few seconds of side-to-side shaking, then a swirl, then shake again, and the gold works its way steadily to the deepest part of the pan.
How Hard to Shake
Shake firmly enough to move the material, but not so hard that dirt sloshes over the rim. You want energy in the pan, not a mess in the creek. If material is leaving before you tilt to wash, you’re being too aggressive.
Here’s how the two motions divide the work:
| Motion | What It Does | Pan Position | When to Use |
|---|---|---|---|
| Side-to-side shake | Drives gold down to the bottom | Level, submerged | After every wash, to re-settle |
| Circular swirl | Moves light material to the surface and edges | Level, submerged | Between shakes to loosen the load |
| Tilt and wash | Removes light sand off the top | Tilted forward | Once gold is settled below |
Recommended Reading
Removing Large Rocks and Settling the Concentrates
After a good round of shaking, the top of the pan is mostly larger, washed rocks with the gold safely below.
Pick out the big rocks by hand. Give each one a quick rinse in the pan as you lift it, so any gold clinging to it drops back down instead of leaving with the rock.
Once the large material is gone, shake the pan again to re-settle everything. This drops the gold back to the bottom before you start washing off the lighter sand.
This remove-and-settle step is worth repeating. Every time you pull the coarse material and re-settle, the gold sinks deeper and gets safer, so you can wash more aggressively without losing it.
For sorting your dirt before it even reaches this stage, gold classifiers explains how screening speeds up the whole process.
Gold Panning Kits
Leveling and Shaking the Pan
Now you begin the actual separation, tilting the pan slightly forward and letting a little light material wash off the top edge.
Tilt the pan a few degrees toward the far edge and dip it into the water with a small forward motion. The top layer of light sand flows off while the heavy gold stays put at the bottom.
Level the pan, shake side to side again to re-settle the gold, then tilt and wash off a little more. This rhythm, level and shake, then tilt and wash, is the core of finishing a pan.
Take off only a thin layer each time. Rushing this is how beginners lose gold, since fine flakes ride out on top if you tip too fast or too far.
Watch the color of what’s leaving. When you start seeing black sand wash toward the edge, slow down, because the gold is right there with it.
Sifting and Using a Magnet
As the pan narrows down to concentrate, you’re left with black sand and, if you did it right, gold.
Black sand is mostly magnetite, an iron mineral that a magnet pulls straight out. Hold a strong magnet under the pan and drag it slowly, and the magnetite lifts away while the gold stays behind.
Work the magnet in small sweeps, clearing a little black sand at a time. A magnet in a small plastic bag makes cleanup easy, since you carry the bag away from the pan and release the collected sand somewhere else.
Some black sand is hematite, which isn’t magnetic, so a magnet won’t get all of it. For that remainder, gentle swirling separates the last of the sand from the gold, or you go straight to the snuffer bottle.
Pouring the Black Sand and Gold Into a Bottle
The final step is getting your gold safely into a container so nothing gets lost.
Add a little clean water to your concentrate and give it a soft swirl so the gold trails into a thin line at the low edge of the pan. This makes it easy to see and to pick up.
For the visible flakes and pickers, a snuffer bottle is the tool. Squeeze the air out, put the tip against the gold, and release, and the suction pulls the gold and a little water right into the bottle.
Tweezers handle the biggest pieces if you prefer. For flour gold, the snuffer bottle is faster and loses less than trying to pinch tiny flakes.
Transfer everything into a vial with a bit of water. The water keeps flour gold from sticking to the sides so you can pour it out cleanly when you weigh or admire your haul.
At around $4,000 per troy ounce, even a vial of fine flakes is worth saving carefully, so take the extra minute to get every speck into the bottle.
Resources for Setting Up Gold Panning Kits
- U.S. Geological Survey (USGS) – Maps and data on where placer gold concentrates in river systems, useful for picking a spot to pan.
- Bureau of Land Management (BLM) – Rules for recreational panning on public land, including where it’s allowed and any equipment limits.
- U.S. Forest Service (USFS) – Guidance on panning within National Forests and along their creeks and rivers.
- Gold Prospectors Association of America (GPAA) – Club claims where you can practice, plus how-to material for new panners.
- TreasureNet – Prospecting forum where members troubleshoot technique and share what’s working on real creeks.
Putting the Whole Process Together
Panning is a rhythm once you learn it. Fill to two-thirds, submerge and settle, shake and swirl, pull the rocks, then level and wash a little at a time until only concentrate remains.
Clear the black sand with a magnet, snuffer up the gold, and get it safely into a vial. Do it in that order and you’ll keep the fine gold that most beginners wash away.
Practice the sequence on a few pans and it becomes second nature, and that muscle memory is really all there is to setting up gold panning kits and working them well.
For the finer points once you’ve got the basics down, gold panning techniques for beginners builds on this same process.
Frequently Asked Questions – Setting Up Gold Panning Kits
How full should I fill my gold pan?
About two-thirds full. A pan filled to the rim is heavy, hard to control, and much more likely to spill gold over the edge when you shake it. Leaving room lets you work the material properly.
What kind of water should I pan in?
Shin-deep, gently moving water is best. Fast current washes gold out of your pan, and still water lets silt cloud everything, so a calm spot just off the main flow is the sweet spot.
What’s the most important motion in panning?
The firm side-to-side shake while the pan is submerged. This drives the heavy gold down through the lighter material to the bottom of the pan, and everything else you do depends on the gold being settled there first.
How do I get black sand away from my gold?
Use a magnet to pull out the magnetite, which is most of the black sand. Drag a strong magnet under the pan in small sweeps, then gently swirl or use a snuffer bottle to separate any non-magnetic sand that remains.
Why do I keep losing fine gold?
Usually you’re washing too fast or tilting the pan too far. Take off only a thin layer each pass, re-settle the gold with a shake between washes, and slow down the moment you see black sand reaching the edge.
What’s the best way to collect the gold?
A snuffer bottle for flakes and flour gold, and tweezers for the biggest pieces. Trail the gold into a thin line with a little water first, then suck it up and transfer it to a vial with water so it doesn’t stick.
Do I need a classifier to set up a kit?
Not strictly, but it helps a lot. Screening your material into consistent sizes before panning lets gold settle cleanly and speeds up every pan, so a classifier is one of the first upgrades worth adding.
⛏ Recommended Gear ⛏


* As an Amazon Associate I earn from qualifying purchases at no extra cost to you.
Subscribe to Our Newsletter

Ryan Conlon is the founder of Pan for Treasure.
A lifelong gold panning enthusiast, he created this site to help beginners learn the ropes and share practical tips from his own time on the creek. [email protected]